Configuring iPhone / iPod Touch for SSL IMAP & SMTP
To set up Mail on an iPhone, iPod Touch or iPad to access and send mail securely using SSL IMAP and SMTP via Neomailbox, follow these steps:
First, select "Settings" from the iPhone home screen.
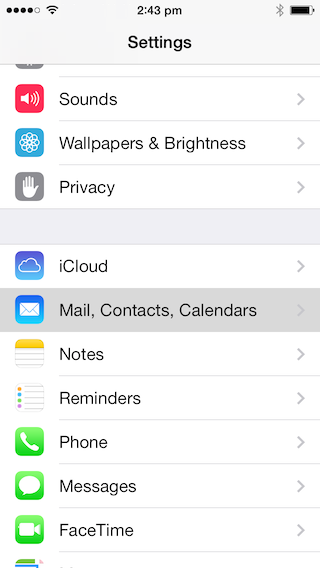
Then select "Mail, Contacts, Calendars" from the Settings menu:
On the next screen, turn OFF the switch for "Load Remote Images", then click on "Add Account"

Now select "Other"

Select "Add Mail Account"

Enter your account information in the next screen, as in the example below. You can use either the @neomailbox.ch or @neomailbox.net domain for your email address.

Now click "Next". Mail will present the screen below for a few seconds:

On the next screen make sure IMAP is selected at the top (it should already be selected):

Lower down on the same screen, type in the Incoming Mail Server information and your Neomailbox username and password as in the example below. Here you must use neomailbox.net for the server name, not neomailbox.ch.

Scroll down and configure the Outgoing Mail server information as in the example below (again, use neomailbox.net for the server name, not neomailbox.ch):

Click "Next". Mail will present the following screen for a few seconds (sometimes this step can take quite some time):

After that, you should see a screen like the following, with tick marks against all the fields:

After that, you'll see the screen below. Turn off the switch next to Notes and Click "Save".

That's it. Your iPhone / iPod Touch is now set up to access and send mail securely via your Neomailbox account. Unless you want to set up additional email addresses to use as "From:" addresses when sending mail, you can close Settings now and skip ahead to the last 2 paragraphs of this guide.
OPTIONAL SECTION: If you'd like to be able to choose from multiple sender ("From:") addresses when sending mail from your iOS device, you can follow the steps below to set up additional email addresses as From: addresses. You can also follow these steps at any time later to add more sender addresses.
NOTE: Make sure to only add valid addresses that you can receive mail for (such as your subdomain addresses or domain addresses hosted with Neomailbox, or your own email addresses at other email services). If you add an address that isn't a valid one that you can receive mail at, you may be able to send mail using that address but will not be able to receive replies sent back to that address.
Select the Neomailbox account you just added:

Select the Account field:

Select the Email field:

You will see the email address you entered during setup listed. Now you can add an additional sender address by selecting "Add Another Email..."

Type in the email address you want to add as a sender address (for example, your @neomailbox.net address):

You can also add subdomain or domain addresses, and select a default sender address (it will have a tick next to it).

When you're finished adding sender addresses, touch on "< Account" at the top left, and then click on Done.

You can now touch on "< Mail..." and "< Settings" to return back to the Settings main screen, and close Settings.
That's it. Your iPhone / iPod Touch is now set up to access and send mail securely via your Neomailbox account. When you open the Mail app you should see your Neomailbox account listed in the list of Mailboxes and you should be able to read and send messages.
If you have any trouble with getting your iPhone or iPod Touch configured for your Neomailbox account, just contact us and we'll be happy to help.